Camera settings
The following settings are tested with the Casio Exilim Z77, but most other Casio cameras are very similar. I have only mentioned the most important settings respectively those which differ from the factory defaults.
Anti Shake
Menu > REC > Anti Shake: Off
If you consider my note about shutter speed later you do not need this automatic ISO setting.
AF-Area
Menu > REC > AF-Area: Spot
The auto focus uses a small spot in the centre of the screen for metering.
L/R-Key
Menu > REC > L/R-Key: ISO
You can use the left and right key next to the set button to change the ISO sensitivity without having to use the menu.
Quick Shutter
Menu > REC > Quick Shutter: Off
Deactivate quick shutter to avoid blurry images.
Grid
Menu > REC > Grid: On
The grid helps you to easily compose your image ("golden ratio", see below).
Memory
Menu > REC > Memory
Configure power on default settings.
On: Bestshot, Flash, Focus, White Balance, ISO, AF Area, Metering
Off: Self timer, Flash Intensity, MF Position, Zoom Position
Picture Size
Menu > Quality > Size: 7M
Always take your pictures in full size so that you can crop them afterwards without any quality loss.
Picture Quality
Menu > Quality > Picture Quality: Normal
Good space/quality ratio
Video Quality
Menu > Quality > Video Quality: HQ (640x480)
Good space/quality ratio
White Balance
Menu > Quality > White Balance: Shade (the tree)
This setting increases the reds in the picture.
ISO
Menu > Quality > ISO: ISO 50
Only increase the sensitivity if the picture is too dark and the shutter speed would be too slow (see below).
Metering
Menu > Quality > Metering: Multi
Multi metering provides correct automatic exposure settings for most conditions.
File No.
Menu > Set Up> File No.: Continue
File names won't be reset to 0001 if you change memory cards.
Bestshot
Don't use "Underwater" Bestshot because it would override all your manual settings (eg. Flash off).
General photo tips
ISO Sensitivity
 The ISO setting specifies the sensor's sensitivity to light. A low sensitivity requires a long exposure (little grain but chance of a blurry image). A high sensitivity requires a short exposure (visible grain but sharp image). You should always use the lowest possible ISO sensitivity which allows taking a sharp image. Especially for night shots you should have a tripod
![]()
![]()
so that you can use ISO 50 or 100 with a long exposure.
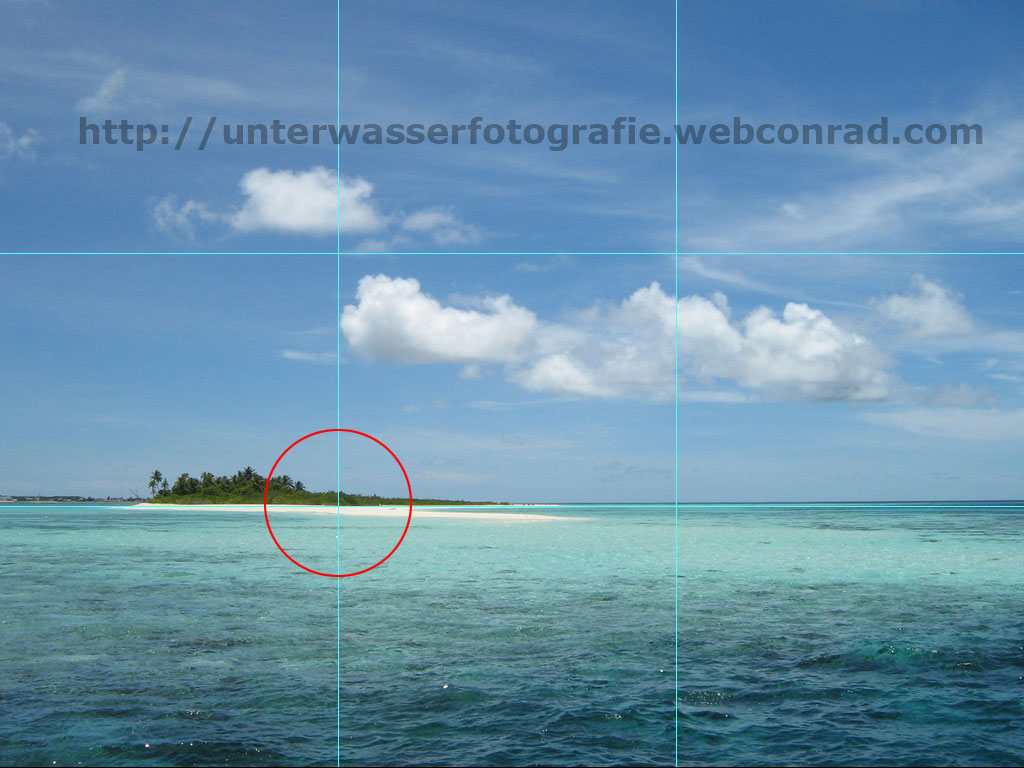 Golden Ratio
Having the main subject in the middle of the picture is boring. Images appear more interesting if you stick to the "golden ratio". Divide the image into three parts (horizontally and vertically) and you'll get four intersections. Place the main subject in either of them.
Focus
The camera offers five different focus modes (Menu > REC > Focus)
| Name | Focus Range (according to manual) | Focus Range | Recommended |
| Auto Focus (AF) | 40 cm - Infinity | 10 cm - Infinity | Yes |
| Macro (Close-up) | 10 cm - 50 cm | 10 cm - 200 cm | No (AF does the same) |
| Pan Focus (PF) | 1,5 m - Infinity | 1 m - Infinity | Yes |
| Infinity | Infinity | 5 m - Infinity | No (PF does the same) |
| Manual Focus (MF) | 10 cm - Infinity | 10 cm - Infinity | No (hardly any sharp pictures) |
You will almost always use the auto focus due to its large focus range. Half-press the shutter button and wait for the green rectangle to display on the screen. In difficult light conditions (eg. underwater) it might be red and you would get a blurry image. In this case switch to the fixed focus "pan focus". You do not need to worry about all other modes as they are dispensable.
Underwater photo tips
Weather
Bright sunlight (noon), cloudless sky and calm water
Distance to subject
Always keep close to the subject (15 cm - 2 m) and don't zoom in (to avoid blurry pictures).
Minimum Shutter Speeds
Moving subjects / strong current: 1/125 s
Still subjects: 1/40 s
Half-press the shutter button and wait for the shutter speed to display on the screen. If it's shorter or equal than what is stated above (higher denominator) take the picture! If the shutter speed is higher increase the ISO sensitivity and try again.
 Flash
Flash
The built-in flash only has a range of about 1 m underwater (external flash can hardly extend this range due to physical limitations underwater). It usually illuminates floating particles in the water and they show up as bright dots (backscatter) in the picture. Only use flash if you are close to the subject and the water is very clear.
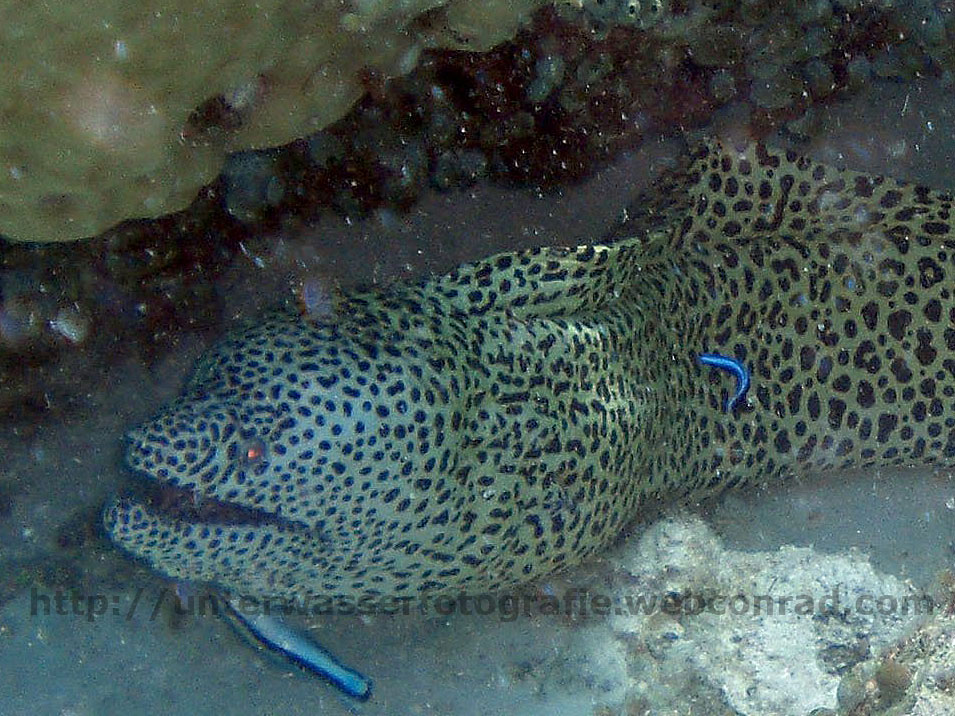
Photograph Fish
Take your time and don't chase your subject. Shoot upward to emphasise the fish's size. Shots from behind the fish rarely look interesting. Isolate the subject in front of open water to emphasise it. As snorkeller don't take all pictures from the surface, descend from time to time!
Continuous Shutter Mode
It is very difficult to take the perfect picture of a fast moving subject. Select the continuous shutter mode (Menu > REC > Continuous: Normal Speed) and press the shutter button. Images will be taken until you release the button.
Pressing the shutter button
Hold the camera with both hands and hold your breath while pressing the shutter button (to avoid blurry pictures).
Videos
Drift in the water and restrict your movements.
Preparation
Charge the battery
Check the free space on your memory card
At least 512 MB, 1 GB recommended
Grease the O-ring
Apply a slight amount of silicone grease to the o-ring and pull it through your fingers. You don't have to regrease it every day, but ensure that the o-ring does not dry out.
Check the O-Ring
There should never be any dirt, hair, sand or other impurities on the o-ring or in the groove. Check the opposite side of the case (the part which has contact to the o-ring when you close the case) as well.
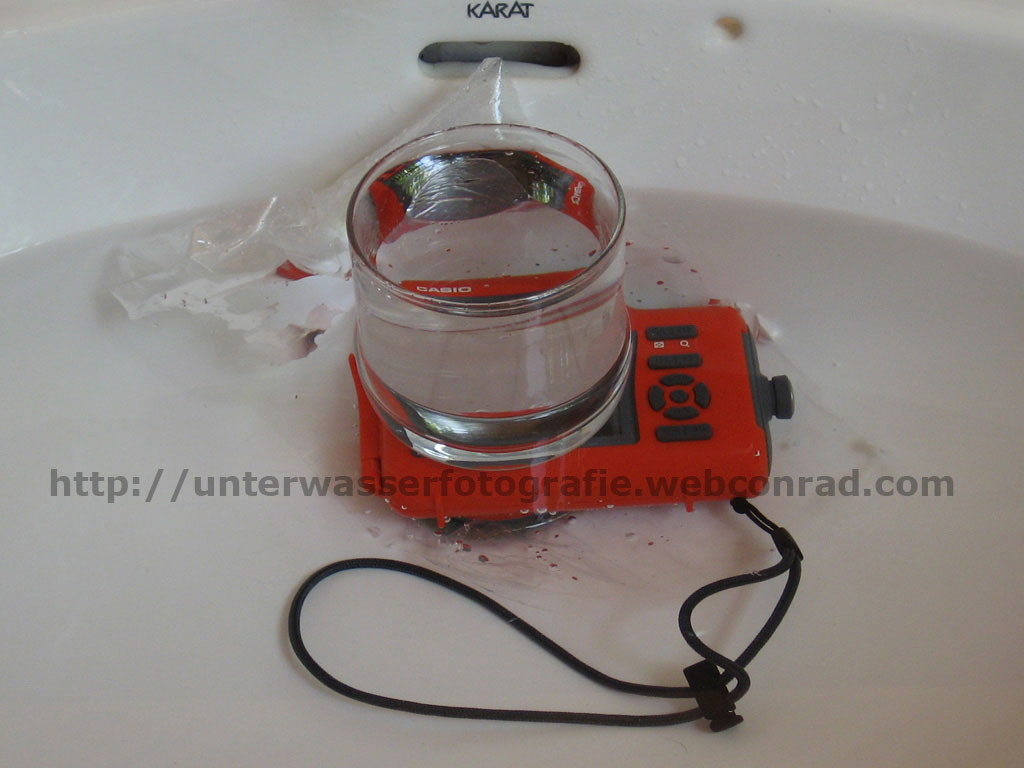 Water tightness test
Close the case without the camera inside and submerge it in water (as shown in the picture). Wait for three minutes, dry the case with a towel and check if no water got inside.
Silica-gel packet
Place one silica-gel packet into the holder before putting the camera into the case.
Cleaning
Boat trip
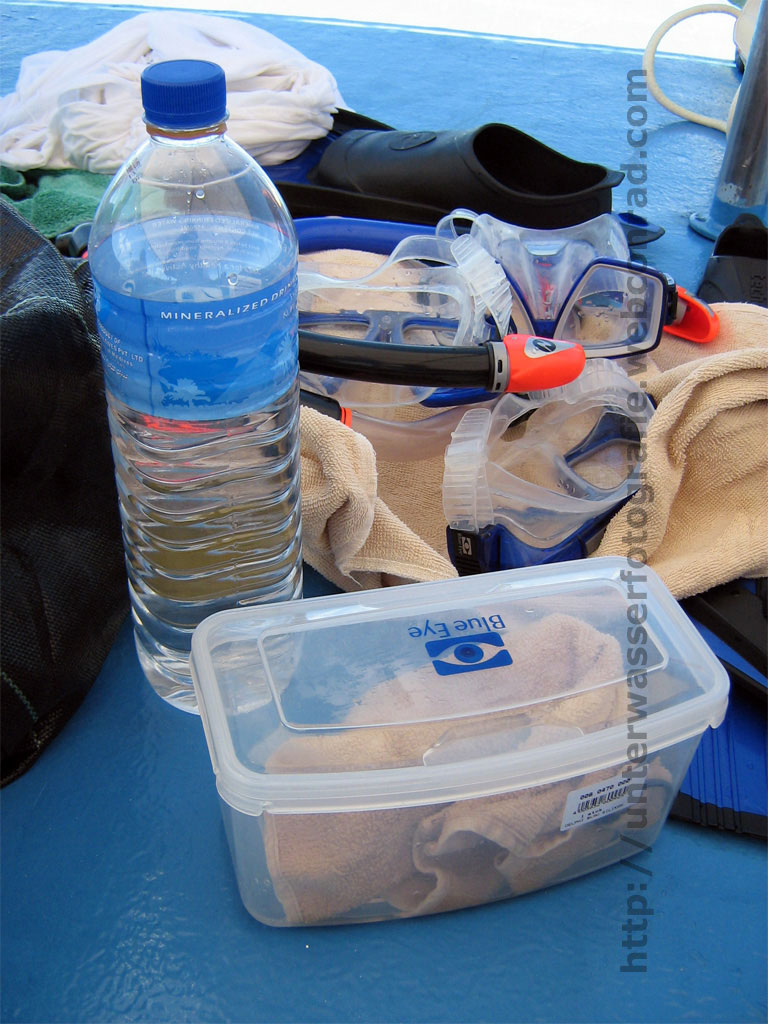 If you don't have the chance to clean the case properly (eg. on a boat trip) wrap cloth soaked with freshwater round the case. You have to keep it wet at all times to avoid the formation of salt crystals. Take a bottle of freshwater along to rinse the case after each dive. Don't open the case in between (particularly not on the beach!).
External cleaning
The proper cleaning after each dive is very important: Submerge the case in water and wait for at least 30 minutes. Before you take it out press all buttons several times to remove any salt or dirt. Dry the case with a towel and take out the camera.
Internal cleaning
Take out the o-ring and inspect for any impurities or even damages. Wipe the groove with a lint-free cloth
![]()
![]()
and regrease the o-ring if necessary.
Water penetration
In the unlikely case of water penetration take the case out of the water immediately, dry it with a towel, take out the camera and remove battery and memory card. Never switch on the camera to check if it's still working at this point in time! Wait for at least 48 hours to see if you can rescue the camera and pictures.
Maintenance
Protect from the sun and sun creme
Never leave the case in areas subjected to direct sunlight and don't touch it with oily (sun creme) fingers.
 Silica-gel packets
Store silica-gel packets in plastic bags so that they can't absorb moisture from the air. You can use each packet for two or three dives. Don't throw them away afterwards: place them in an oven at 80° C (176° F) for at least half an hour and they will be as good as new.
Short-term storage
Leave the case ajar so that the o-ring doesn't deform under pressure.
Long-term storage
Take out the o-ring and wipe it with a lint-free cloth. Grease the o-ring a little bit more than usual and place it back into the groove. Leave the case open and store it in a dry, shady place.